“Your nails are a reflection of yourself”
Fact. That is exactly why I always try to have my manicure looking top notch. Let’s get real tho, it can be super time consuming to constantly be painting your nails or really expensive to keep up with your fills at the salon. SO, if you’re like me and really enjoy having professional and trendy looking nails on a budget, keep on reading!

The original packaging, which is still in some stores, were made to look like cute little bottles of nail polish.
Senior year of college in NYC, my roommate and I were walking thru Times Square and saw a sign that said “FREE MANICURES”. The world free always catches a college students attention. We made our way to the commotion and a group of women, from the Impress Manicure Company, were giving away free packs of their new products. These products just so happened to be press on nails. Retail for around $10. I took a few packages never thinking I would actually use them. Like come on, I haven’t used press on nails since I was like seven. Well, fast forward a few weeks and I gave them a shot. Followed the instructions word for word and BAM! For the next two weeks I was getting complimented on my manicure! People were assuming they were actually gel nails because they had such a great shine to them! I was hooked! Oh and yes, you did read that right.. TWO WEEKS!
I’ve always been one to obsess over instructions on beauty products, so let me give you a run thru on the instructions and highlight the most important steps. By the way, it usually only takes 15 minutes or less once you get the hang of it.

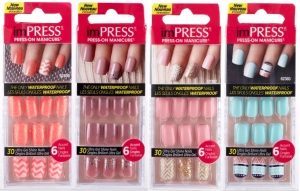
These are the packages I have seen more and more lately! They constantly come out with new designs and trendy colors!
Each package contains 24 nails. Obviously you only need 10, but there are 12 different sizes to ensure you get them to fit your nails correctly. The first thing I always do is, besides taking my nail polish off, is trimming my nails down because you don’t want your nails to be longer and poke thru underneath. Next, I pour out all the nails, find one for each finger and lay them out left on one side and right had on the other, so I don’t mix any up. Never start with your thumbs! It will make the process a lot harder than it needs to be, trust me. With that said, start with your pointer finger, find the nail that fits, slowly remove the plastic strip from the bottom and gently press it on your nail. Press it on in almost a rolling motion and do that for about a minute. In the past I have just plopped it on and pressed it once, and well those came off in a few days. Anyway, just do your thumbs last and enjoy your new beautiful manicure!

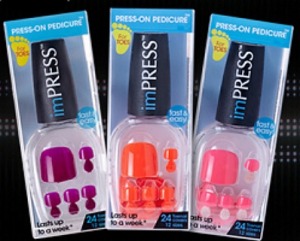
They even have ones for your toes that are just as easy!!! I am addicted to using them in the summer!
Removal is just as easy! Gently peel them off! I usually wear them until it’s obvious my nails are growing under them and I go pop on a new pair! The only con I can really think of is, if you’re like me, I constantly run my fingers thru my hair and sometimes my hair gets caught under the fake nail. Besides that, they are nearly perfect!!

My current Impress Mani. I’ve had these babies on for about 13 days now. There is some nail growth, but I will probably wait a few more days before I change them out!


